Scouting: Difference between revisions
No edit summary |
mNo edit summary |
||
| (17 intermediate revisions by 2 users not shown) | |||
| Line 1: | Line 1: | ||
Scouting is the means to recruit characters into your roster. Once in possession of a character, any subsequent summons of the character will be converted to " | {{Warning Empirical}} | ||
Scouting is the means to recruit characters into your roster. Once in possession of a character, any subsequent summons of the character will be converted to "Memories," which are used for the proficiency system. | |||
Through the Scout screen, there are four types of scouting, each requiring a specific item to do your recruitment: | To see a list of past and current pick-up banners, see [[Banner History|Banner History.]] | ||
[[Category:Game Guide]] | |||
__TOC__ | |||
== Overview == | |||
Through the Scout screen, there are four types of scouting, each requiring a specific item to do your recruitment. | |||
For more information on scouting items, refer to [[Items#Scouting Items|Items]]. Some of these are acquired exclusively through [[Shop]]. | |||
{| class="wikitable" | |||
!Scouting Option | |||
!Icon | |||
!Scout Item | |||
!Description | |||
!Character Pool | |||
!Can Get Limited Character? | |||
|- | |||
|'''Premium Scouting''' | |||
|[[File:StoneOfDragonsVein.png|50px]][[File:Ticket.png|50px]] | |||
|Edgar's Freebie Tickets and Dragon Vein Stones | |||
|Scout through a pick-up banner with a pool consisting of 3★ to 6★, with a select few having an increased 1% chance of being pulled. | |||
|Featured Rate Ups + | |||
Standard Scouting | |||
(pool prior to rate up only) | |||
|Pick-Ups Only | |||
|- | |||
|'''Eidos Scouting''' | |||
|[[File:StoneOfDragonsVein.png|50px]][[File:Ticket.png|50px]] | |||
|Edgar's Freebie Tickets and Dragon Vein Stones | |||
|Scout for [[Eidos]], with a select few having an increased chance of being pulled. | |||
|Eidos Only | |||
|n/a | |||
|- | |||
|'''Partner Referrals''' | |||
|[[File:Referral6.png|50px]] | |||
|Partner Referrals | |||
|Scout a random character within a specified pool of characters for a specific rarity based on the item's tier. | |||
|Standard + Limited Scouting | |||
|Yes | |||
|- | |||
|'''Partner Scout Tickets''' | |||
|[[File:PartnerScout6.png|50px]] | |||
|Partner Scout Tickets | |||
|Scout a character through a selection of a particular rarity based on the item's tier or description. | |||
|Specified | |||
|If Specified | |||
|- | |||
|'''Recruitment Flyers''' | |||
|[[File:BlankRecruitingFlyer.png|50px]] | |||
|Recruitment Flyers | |||
|Scout through the latest pool of every character, though the chances are weighed heavily towards getting 1★ to 3★. | |||
|Flyers Only + Standard Scouting | |||
|No | |||
|- | |||
|'''Recommendation Letters''' | |||
|[[File:Recommendation Letter Edgar.png|50x50px]] | |||
|Recommendation Letter | |||
|Scout a specific character. | |||
|Specific Character | |||
|If Specified | |||
|} | |||
__TOC__ | |||
== Eidos Scouting == | |||
Outside of pulling for characters, Eidos scouting is used to obtain Eidos, which units can equip, unlock a still of, and be exchanged for Ether. | |||
Refer to [[Eidos]] for more information. | |||
== General Scouting Pools == | == General Scouting Pools == | ||
There are different scouting pools depending on the method. You can refer to these lists to have an idea which character is available where: | There are different scouting pools depending on the method. You can refer to these lists to have an idea of which character is available where: | ||
* [[:Category:Flyers Only|Flyers Only]] - These characters can only be scouted through Flyers. | * [[:Category:Flyers Only|Flyers Only]] - These characters can only be scouted through Flyers. | ||
| Line 19: | Line 76: | ||
* [[:Category:Limited Scouting|Limited Scouting]] - These characters are only available on specific scout methods, usually limited by their featured banner or relevant shop packs. | * [[:Category:Limited Scouting|Limited Scouting]] - These characters are only available on specific scout methods, usually limited by their featured banner or relevant shop packs. | ||
Note: | ''Note: Some exceptions are given as quest rewards.'' | ||
== Premium Scout Items == | === New Characters on Pool === | ||
Whenever a new character is added to the game, typically through their debut rate-up banner, non-limited characters become available in the Standard Scouting pool for flyers and referrals, while limited characters are added to referrals. | |||
When characters debut via a pick-up banner, they tend to be kept exclusive to that banner until it is concluded. | |||
== Scout Pools for Premium Scout Items == | |||
Premium Scout Items are typically available in the shop and refer to banners for their pools. They do not have an expiry. | |||
For more information, refer to [[Shop History]] and [[Banner History]], respectively. | |||
=== Partner Referrals === | === Partner Referrals === | ||
Partner Referrals | Partner Referrals grant you a random pull with a selection of units in a particular rarity, usually up to the latest one available when the referral is released. | ||
=== | === Partner Scout Tickets === | ||
Partner Scout Tickets grants you a specific unit within a selection in a particular rarity. It has the latest Standard Scouting characters and Limited Characters released 6 months ago. | |||
=== Recommendation Letters === | |||
Recommendation Letters grant you a specific unit. Most letters are instantly used, with the only exception being Edgar's. | |||
{| class="wikitable" | {| class="wikitable" | ||
!Character | !Character | ||
!Acquired From: | |||
|- | |- | ||
|[[Edgar]] | |||
|Shop | |||
|- | |||
|[https://anothereidoswiki.ddns.net/index.php/Gaia Gaia], [https://anothereidoswiki.ddns.net/index.php/Amorey Amorey], [https://anothereidoswiki.ddns.net/index.php/Barboros Barboros] | |||
|0-4 | |0-4 | ||
|- | |- | ||
|[https://anothereidoswiki.ddns.net/index.php/Elaine Elaine] | |||
|0-5 | |0-5 | ||
|- | |- | ||
|[https://anothereidoswiki.ddns.net/index.php/Mage_Goblin Mage Goblin], [https://anothereidoswiki.ddns.net/index.php/Goblin_Archer Goblin Archer], [https://anothereidoswiki.ddns.net/index.php/Goblin_Fighter Goblin Fighter] | |||
|0-7 | |0-7 | ||
|- | |- | ||
|[https://anothereidoswiki.ddns.net/index.php/Leonhart Leonhart], [https://anothereidoswiki.ddns.net/index.php/Robin Robin] | |||
|0-31 | |0-31 | ||
|- | |- | ||
|[https://anothereidoswiki.ddns.net/index.php/Barboros_(New_Look) Barboros (New Look)] | |||
|3-27 | |3-27 | ||
|[ | |- | ||
|} | |[[Gaia (Awakened)]] | ||
|5-34 | |||
|} | |||
== Recruitment Flyers == | |||
These are common drops from story/event quests that can recruit characters of any rarity. Notably, the only way to obtain the most 1★ and 2★ characters and the odds of getting any character above three starts are weighted very low. | |||
'''It is advised not to farm specifically for flyers.''' | |||
===Flyer Drop Rates=== | ===Flyer Drop Rates=== | ||
There are four | There are four types of flyers that recruit a certain number of characters depending on the tier. There is a total 90% chance to drop any of these items through only Story and Event quests. | ||
They can also be obtained through event shops. Quest Stamina cost does not affect drop rates. | |||
{| class="wikitable" style="vertical-align:middle; background-color:#F8F9FA; color:#202122;" | {| class="wikitable" style="vertical-align:middle; background-color:#F8F9FA; color:#202122;" | ||
|- style="font-weight:bold; text-align:center; background-color:#EAECF0;" | |- style="font-weight:bold; text-align:center; background-color:#EAECF0;" | ||
| Line 146: | Line 152: | ||
| style="text-align:center;" |3% | | style="text-align:center;" |3% | ||
|} | |} | ||
===Flyer Scout Rates=== | ===Flyer Scout Rates=== | ||
{| class="wikitable" | {| class="wikitable" | ||
!Rarity | !Rarity | ||
| Line 187: | Line 184: | ||
|} | |} | ||
==Premium Scouting == | |||
This is the typical way of obtaining characters, drawing from a pool of 3★ to 6★ characters with a few specified to have a +1% increased rate as their "pick-up rate." This rate draws from the pick-up rate of 3★. | |||
Pick-ups give improved chances to scout particular characters by taking a 1% rate up from the 3★ appearance rate for each pick-up character. These banners usually come in pairs, with one coming out delayed by around a week. If there is a new character for a particular banner, it will be exclusive to that banner until it ends. Afterward, they will be part of the standard pool. Characters labeled as "Limited Time Only" are part of limited scouting and will only be available again once their banner reruns. | |||
Due to how the rate up works, there is only roughly a 0.5% rate difference between a rate up to 6★ and a rate up to 5★. | |||
Also, currently, there is no benefit to doing 10 pulls aside from convenience. | |||
* Check [https://anados-collection-tracker.vercel.app/gacha/simulator here] for a gacha simulator. | |||
*For a history of pick-up banners, refer to [[Banner History]]. | |||
*For premium scouting tips, you can refer to [[Tips and Tricks#Premium Scouting Tips|Tips and Tricks]]. | |||
*FAQ: [[FAQ#What are the odds of getting my desired unit?|What are the odds of getting my desired unit?]] | |||
===Standard Rates=== | |||
===Standard Rates | |||
{| class="wikitable" style="vertical-align:middle; background-color:#F8F9FA; color:#202122;" | {| class="wikitable" style="vertical-align:middle; background-color:#F8F9FA; color:#202122;" | ||
|- style="font-weight:bold; text-align:center; background-color:#EAECF0;" | |- style="font-weight:bold; text-align:center; background-color:#EAECF0;" | ||
!Rarity | !Rarity | ||
!Appearance Rate | !Appearance Rate | ||
|- | |- | ||
| | |6★ | ||
|2% | |2% | ||
|- | |- | ||
| | | | ||
5★ | |||
|10% | |10% | ||
|- | |- | ||
| | |4★ | ||
|50% | |50% | ||
|- | |- | ||
| | |3★ | ||
|38% | |38% | ||
|} | |} | ||
Latest revision as of 04:57, 19 March 2025
| ⚠ Information on this page is based on empirical data. Since information is not disclosed by Habbit, the data mentioned is instead sourced from player testing and observation. A margin of error and/or inconsistencies should be expected. |
Scouting is the means to recruit characters into your roster. Once in possession of a character, any subsequent summons of the character will be converted to "Memories," which are used for the proficiency system.
To see a list of past and current pick-up banners, see Banner History.
Overview[edit | edit source]
Through the Scout screen, there are four types of scouting, each requiring a specific item to do your recruitment.
For more information on scouting items, refer to Items. Some of these are acquired exclusively through Shop.
| Scouting Option | Icon | Scout Item | Description | Character Pool | Can Get Limited Character? |
|---|---|---|---|---|---|
| Premium Scouting |  
|
Edgar's Freebie Tickets and Dragon Vein Stones | Scout through a pick-up banner with a pool consisting of 3★ to 6★, with a select few having an increased 1% chance of being pulled. | Featured Rate Ups +
Standard Scouting (pool prior to rate up only) |
Pick-Ups Only |
| Eidos Scouting |  
|
Edgar's Freebie Tickets and Dragon Vein Stones | Scout for Eidos, with a select few having an increased chance of being pulled. | Eidos Only | n/a |
| Partner Referrals | 
|
Partner Referrals | Scout a random character within a specified pool of characters for a specific rarity based on the item's tier. | Standard + Limited Scouting | Yes |
| Partner Scout Tickets | 
|
Partner Scout Tickets | Scout a character through a selection of a particular rarity based on the item's tier or description. | Specified | If Specified |
| Recruitment Flyers | 
|
Recruitment Flyers | Scout through the latest pool of every character, though the chances are weighed heavily towards getting 1★ to 3★. | Flyers Only + Standard Scouting | No |
| Recommendation Letters | 
|
Recommendation Letter | Scout a specific character. | Specific Character | If Specified |
Eidos Scouting[edit | edit source]
Outside of pulling for characters, Eidos scouting is used to obtain Eidos, which units can equip, unlock a still of, and be exchanged for Ether.
Refer to Eidos for more information.
General Scouting Pools[edit | edit source]
There are different scouting pools depending on the method. You can refer to these lists to have an idea of which character is available where:
- Flyers Only - These characters can only be scouted through Flyers.
- Standard Scouting - These characters are available in every scout method.
- Limited Scouting - These characters are only available on specific scout methods, usually limited by their featured banner or relevant shop packs.
Note: Some exceptions are given as quest rewards.
New Characters on Pool[edit | edit source]
Whenever a new character is added to the game, typically through their debut rate-up banner, non-limited characters become available in the Standard Scouting pool for flyers and referrals, while limited characters are added to referrals.
When characters debut via a pick-up banner, they tend to be kept exclusive to that banner until it is concluded.
Scout Pools for Premium Scout Items[edit | edit source]
Premium Scout Items are typically available in the shop and refer to banners for their pools. They do not have an expiry.
For more information, refer to Shop History and Banner History, respectively.
Partner Referrals[edit | edit source]
Partner Referrals grant you a random pull with a selection of units in a particular rarity, usually up to the latest one available when the referral is released.
Partner Scout Tickets[edit | edit source]
Partner Scout Tickets grants you a specific unit within a selection in a particular rarity. It has the latest Standard Scouting characters and Limited Characters released 6 months ago.
Recommendation Letters[edit | edit source]
Recommendation Letters grant you a specific unit. Most letters are instantly used, with the only exception being Edgar's.
| Character | Acquired From: |
|---|---|
| Edgar | Shop |
| Gaia, Amorey, Barboros | 0-4 |
| Elaine | 0-5 |
| Mage Goblin, Goblin Archer, Goblin Fighter | 0-7 |
| Leonhart, Robin | 0-31 |
| Barboros (New Look) | 3-27 |
| Gaia (Awakened) | 5-34 |
Recruitment Flyers[edit | edit source]
These are common drops from story/event quests that can recruit characters of any rarity. Notably, the only way to obtain the most 1★ and 2★ characters and the odds of getting any character above three starts are weighted very low.
It is advised not to farm specifically for flyers.
Flyer Drop Rates[edit | edit source]
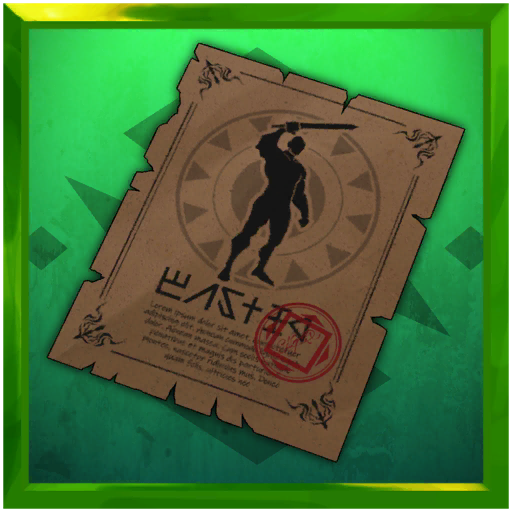
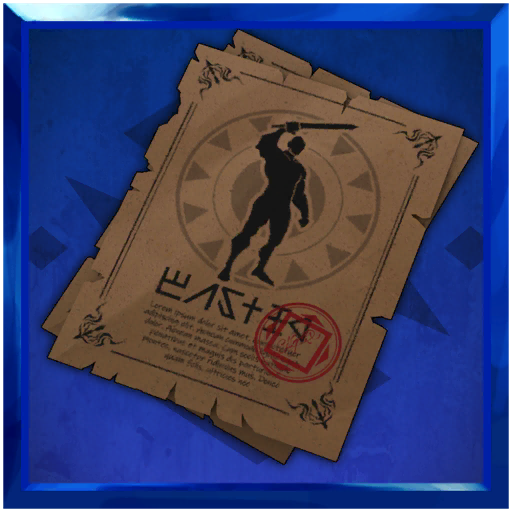
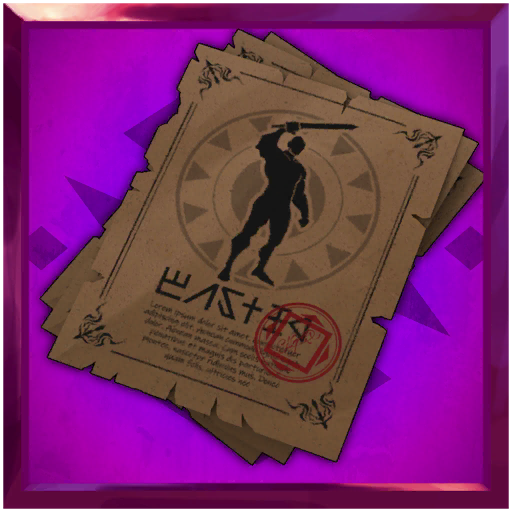
There are four types of flyers that recruit a certain number of characters depending on the tier. There is a total 90% chance to drop any of these items through only Story and Event quests.
They can also be obtained through event shops. Quest Stamina cost does not affect drop rates.
| Item | Number of Scouts | Drop Rate |
|---|---|---|

|
10 Blank Flyers scouts 1 character. | 65% |
|
1 Green Flyer scouts 1 character. | 14% |
|
1 Blue Flyer scouts 2 characters. | 8% |
|
1 Purple Flyer scouts 3 characters. | 3% |
Flyer Scout Rates[edit | edit source]
| Rarity | Quantity | Estimated Rate |
|---|---|---|
| 1★ |
1690 |
24% |
| 2★ | 2417 | 35% |
| 3★ | 2849 | 40% |
| 4★ | 37 | 0.50% |
| 5★ | 6 | 0.10% |
| 6★ | 1 | 0.02% |
Premium Scouting[edit | edit source]
This is the typical way of obtaining characters, drawing from a pool of 3★ to 6★ characters with a few specified to have a +1% increased rate as their "pick-up rate." This rate draws from the pick-up rate of 3★.
Pick-ups give improved chances to scout particular characters by taking a 1% rate up from the 3★ appearance rate for each pick-up character. These banners usually come in pairs, with one coming out delayed by around a week. If there is a new character for a particular banner, it will be exclusive to that banner until it ends. Afterward, they will be part of the standard pool. Characters labeled as "Limited Time Only" are part of limited scouting and will only be available again once their banner reruns.
Due to how the rate up works, there is only roughly a 0.5% rate difference between a rate up to 6★ and a rate up to 5★.
Also, currently, there is no benefit to doing 10 pulls aside from convenience.
- Check here for a gacha simulator.
- For a history of pick-up banners, refer to Banner History.
- For premium scouting tips, you can refer to Tips and Tricks.
- FAQ: What are the odds of getting my desired unit?
Standard Rates[edit | edit source]
| Rarity | Appearance Rate |
|---|---|
| 6★ | 2% |
|
5★ |
10% |
| 4★ | 50% |
| 3★ | 38% |