|
|
| (39 intermediate revisions by 3 users not shown) |
| Line 1: |
Line 1: |
| Scouting a character involves one of the following: spend Dragon Vein stones or Edgar Tickets to pull on Pick Up Banners, use farmable Flyers, or get them as stage rewards. Other items such as partner referrals, partner scout tickets, and recommendation letters are also options if you want to spend money on the game. | | {{Warning Empirical}} |
| ==Free Characters==
| | Scouting is the means to recruit characters into your roster. Once in possession of a character, any subsequent summons of the character will be converted to "Memories," which are used for the proficiency system. |
| You can obtain free characters via completing the main storyline. See [[Main Storyline]] for more info.
| |
|
| |
|
| ==Recruitment Flyers== | | To see a list of past and current pick-up banners, see [[Banner History|Banner History.]] |
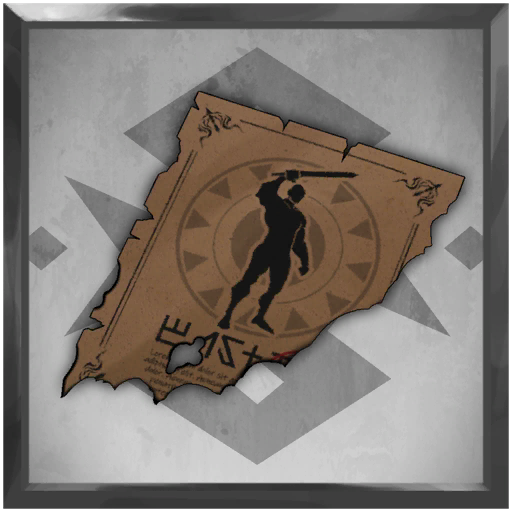
| '''Flyers''' can recruit any character from 1 to 6 star rarity, however the odds are extraordinarily low.
| | [[Category:Game Guide]] |
| | __TOC__ |
| | == Overview == |
| | Through the Scout screen, there are four types of scouting, each requiring a specific item to do your recruitment. |
|
| |
|
| *New characters are added to the flyer pool as they are released. It's unknown if limited characters are added to the pool (likely not).
| | For more information on scouting items, refer to [[Items#Scouting Items|Items]]. Some of these are acquired exclusively through [[Shop]]. |
| *The rarity of the flyer doesn't affect the rarity of the characters scouted. Active banners also don't affect the characters scouted.
| |
| *The drop rate for flyers has been estimated through 2000 consecutive plays of PN - 3, EW - 19, and 3-9 all had similar results. Therefore it is ''likely'' the stamina cost of quests and event they are a part of do not effect flyer drops.
| |
| *Upon inquiry regarding flyer recruit rates and changes to the pool, Habbit has responded "rates for the Recruitment Flyers units are considered undisclosed specification. Therefore, we are unable to provide detailed information regarding your inquiry."
| |
| | |
| === Flyer Drop Rates===
| |
| [[File:Chart Flyers.png|right|frameless|950x950px]] | |
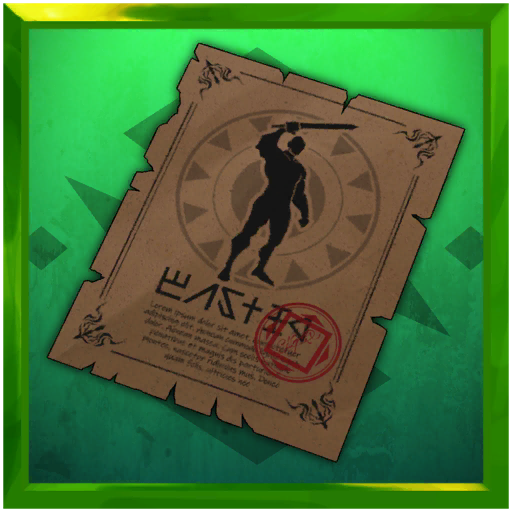
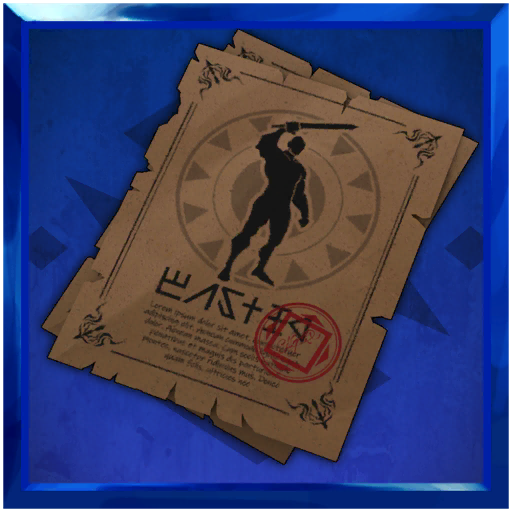
| All story and event quests have a 90% chance to drop a Blank, Green, Blue, or Purple recruitment flyer, sometimes they won't drop a flyer at all. Exploration quests do not drop flyers. The number of characters scouted from recruitment flyers and the probability of obtaining one after clearing a quest are as follows:
| |
| {| class="wikitable" style="vertical-align:middle; background-color:#F8F9FA; color:#202122;"
| |
| |- style="font-weight:bold; text-align:center; background-color:#EAECF0;"
| |
| ! Item
| |
| ! Number of Scouts
| |
| ! Drop Rate
| |
| |-
| |
| | style="color:#002BB8;" |[[File:BlankRecruitingFlyer.png|50px]]
| |
| | 10 Blank Flyers scouts 1 character.
| |
| | style="text-align:center;" | 65%
| |
| |-
| |
| | style="color:#002BB8;" |[[File:AdventurerRecruitingFlyer.png|50px]]
| |
| | 1 Green Flyer scouts 1 character.
| |
| | style="text-align:center;" | 14%
| |
| |-
| |
| | style="color:#002BB8;" |[[File:AdventurerRecruitingFlyer2.png|50px]]
| |
| | 1 Blue Flyer scouts 2 characters.
| |
| | style="text-align:center;" | 8%
| |
| |-
| |
| | style="color:#002BB8;" |[[File:AdventurerRecruitingFlyer3.png|50px]]
| |
| | 1 Purple Flyer scouts 3 characters.
| |
| | style="text-align:center;" | 3%
| |
| |}
| |
| Weighted Average of Characters Obtained per Quest Clear = 0.455 Characters
| |
| | |
| Average Flyer Scouts per Day From Twenty-Four 10 Stamina Quests = 10.92 Characters
| |
| | |
| ===Flyer Scout Rates===
| |
| 7000 consecutive flyer scouts resulted in the following quantities:
| |
| {| class="wikitable" | | {| class="wikitable" |
| !Rarity | | !Scouting Option |
| !Quantity | | !Icon |
| !Estimated Rate | | !Scout Item |
| | !Description |
| | !Character Pool |
| | !Can Get Limited Character? |
| |- | | |- |
| | style="text-align:center;" |'''1★'''
| | |'''Premium Scouting''' |
| | style="text-align:center;" |1690 | | |[[File:StoneOfDragonsVein.png|50px]][[File:Ticket.png|50px]] |
| | style="text-align:center;" |24% | | |Edgar's Freebie Tickets and Dragon Vein Stones |
| | |Scout through a pick-up banner with a pool consisting of 3★ to 6★, with a select few having an increased 1% chance of being pulled. |
| | |Featured Rate Ups + |
| | Standard Scouting |
| | (pool prior to rate up only) |
| | |Pick-Ups Only |
| |- | | |- |
| | style="text-align:center;" | '''2★'''
| | |'''Eidos Scouting''' |
| | style="text-align:center;" |2417 | | |[[File:StoneOfDragonsVein.png|50px]][[File:Ticket.png|50px]] |
| | style="text-align:center;" |35% | | |Edgar's Freebie Tickets and Dragon Vein Stones |
| | |Scout for [[Eidos]], with a select few having an increased chance of being pulled. |
| | |Eidos Only |
| | |n/a |
| |- | | |- |
| | style="text-align:center;" |'''3★'''
| | |'''Partner Referrals''' |
| | style="text-align:center;" |2849 | | |[[File:Referral6.png|50px]] |
| | style="text-align:center;" |40% | | |Partner Referrals |
| | |Scout a random character within a specified pool of characters for a specific rarity based on the item's tier. |
| | |Standard + Limited Scouting |
| | |Yes |
| |- | | |- |
| | style="text-align:center;" |'''4★'''
| | |'''Partner Scout Tickets''' |
| | style="text-align:center;" | 37 | | |[[File:PartnerScout6.png|50px]] |
| | style="text-align:center;" |0.50% | | |Partner Scout Tickets |
| | |Scout a character through a selection of a particular rarity based on the item's tier or description. |
| | |Specified |
| | |If Specified |
| |- | | |- |
| | style="text-align:center;" |'''5★'''
| | |'''Recruitment Flyers''' |
| | style="text-align:center;" | 6 | | |[[File:BlankRecruitingFlyer.png|50px]] |
| | style="text-align:center;" |0.10% | | |Recruitment Flyers |
| | |Scout through the latest pool of every character, though the chances are weighed heavily towards getting 1★ to 3★. |
| | |Flyers Only + Standard Scouting |
| | |No |
| |- | | |- |
| | style="text-align:center;" | '''6★'''
| | |'''Recommendation Letters''' |
| | style="text-align:center;" |1 | | |[[File:Recommendation Letter Edgar.png|50x50px]] |
| | style="text-align:center;" |0.02% | | |Recommendation Letter |
| | |Scout a specific character. |
| | |Specific Character |
| | |If Specified |
| |} | | |} |
|
| |
|
| === Flyers Gacha Pool===
| | __TOC__ |
| Every character available at launch is in the pool. By the first half-anniversary, the pool is expanded to include every character pullable up until that point, which was up until the two chapter 2 banners. Flyers are unlikely to contain limited-time units in the future. Currently it is unclear if the pool has been expanded again, or when it will be, but a likely indicator may be on the anniversary.
| |
| <div class="mw-collapsible mw-collapsed">
| |
| '''★6'''
| |
| Jinnosuke / Zacharoff / Siddeley / Jalam
| |
| Theodor / Thomas / Bashkar / Bart / Billford / Edgar
| |
| Rasho / Dakkar / Pino / Jade / Equus / Kafka / Hellion
| |
|
| |
| '''★5'''
| |
| Rook / Sol / Brute / Hulk
| |
| Wrecker / Morgan / Yabsakha / Ragnar / Romanes
| |
| Harimau / Beelzebub / Rothart / Corca
| |
| Barlitz / Hanzo / Stalon
| |
|
| |
| '''★4'''
| |
| Kagura / Karetovi / Lute / Thorkell
| |
| Nitro / Patty / Fu / Pugi
| |
| Rai / Leonhart / Ornis
| |
| Lisa / Alec
| |
|
| |
| '''★3'''
| |
| Arcana / Elaine / Gymnos / Dyne
| |
| Baran / Bantu / Flet / Charlotte
| |
| Yurt / Robin / Amorey / Seals
| |
| Kongoh
| |
|
| |
| '''★2'''
| |
| Mummy Mobs / Obsidonian Imperial Mobs / Pirate Mobs
| |
|
| |
| '''★1'''
| |
| Bandit Ballista / Goblin Mobs / Pays Blanc Soldier Mobs
| |
| </div>
| |
|
| |
|
| == Premium Scouting== | | == Eidos Scouting == |
| [[File:Ticket.png|50px]][[File:StoneOfDragonsVein.png|50px]]
| | Outside of pulling for characters, Eidos scouting is used to obtain Eidos, which units can equip, unlock a still of, and be exchanged for Ether. |
| <ul>
| |
| <li>To scout a character from the banners the player needs either 1 '''Edgar's Freebie Ticket''' or 4 '''Dragon stones'''. </li>
| |
| <li> It doesn't matter if the player uses freebie tickets or dragon stones, the scout rates are the same. </li>
| |
| <li> '''There is no pity system and there is no benefit in doing 10 pulls.'''
| |
| </li>
| |
| <li>New characters are added to the standard pool of latest gacha banner, unless the chapter/event has two simultaneous banners. New characters ''might not'' be on the accompanying banner until the next chapter/event Check the banner's pool in game before scouting.
| |
| </li>
| |
| <li> Characters that are explicitly stated to be time limited are never added to the next banner. </li>
| |
| <li> An inquiry was sent to Habbit regarding future improvements to the premium scouting system and if they plan to add a pity system. Habbit responded "regarding your inquiry, we regret to inform you that we are unable to disclose the content of the update." </li>
| |
| <li> Paid stones expire 180 days after purchase, which means they are removed from your inventory if you don't use them. Free stones and stones obtained from the monthly pass do not expire. Paid stones are automatically used first when scouting.
| |
| </li>
| |
| </ul>
| |
| [[File:Example Multi-Pull.png|thumb|400x400px|There is no benefit in saving for a multi-pull. It's best just to do single pulls until you get your desired featured character, that way you save your remaining stones for the next banner.In this example the desired featured character is 6-star Theodore. If the player stopped scouting after acquiring him in the first four single pulls they could use the remaining 24 unused stones for the next banner.]]
| |
|
| |
|
| === Premium Scouting Tips ===
| | Refer to [[Eidos]] for more information. |
|
| |
|
| *There is a benefit to performing consecutive single pulls rather than saving for a multi-pull. If you scout the targeted featured character within the first few single pulls you no longer need to scout on the banner and you can save the remaining stones you would have used for next banner.
| | == General Scouting Pools == |
| * Only try scouting for featured characters, trying to obtain an off-banner specific 5-star or 6-star is very difficult. If none of the featured 5-star or 6-stars interest you, don't scout.
| | There are different scouting pools depending on the method. You can refer to these lists to have an idea of which character is available where: |
| * Prioritize scouting for limited characters. Habbit has a tendency to feature many limited alternates simultaneously, waiting for these banners to appear then attempting to scout for limited characters can net you a lot of off-banner 5-stars.
| |
| * 3-stars and 4-stars are essentially "free" characters you will clear out both of the 3-star and 4-star pools within the first few weeks of playing just by scouting them off-banner or through flyers. If you see "new" 3-stars or 4-stars being featured, and those are the only characters you want, don't bother scouting for them. You are likely to obtain these off-banner the next banner you decide to scout on.
| |
| * Missing a standard non-limited 5-star doesn't hurt as much as missing a non-limited 6 star. It's possible you will acquire many 5-stars including the one you missed off-banner on the next banner you decide to scout on. Missing a specific 6-star can hurt you a lot more, it's advised to go for 6-stars while they are featured.
| |
| *It can take anywhere from 1 to 300+ pulls without getting a specific featured character. Spending an absurd amount of stones trying to get a featured character is common. Sometimes it's best just to let it go.
| |
| *'''Note''': Always remember that ''Another Eidos'' is just a porn game. Try to only spend money as one's own income allows, and consider simply commissioning an artist for pornography instead. Take caution that gacha mechanics are generally seen as predatory and may develop gambling addiction. If the latter is the case, please seek mental and/or spiritual counsel immediately as it can (and will) be detrimental to one's life.
| |
|
| |
|
| ===Standard Rates===
| | * [[:Category:Flyers Only|Flyers Only]] - These characters can only be scouted through Flyers. |
| | * [[:Category:Standard Scouting|Standard Scouting]] - These characters are available in every scout method. |
| | * [[:Category:Limited Scouting|Limited Scouting]] - These characters are only available on specific scout methods, usually limited by their featured banner or relevant shop packs. |
| | |
| | ''Note: Some exceptions are given as quest rewards.'' |
|
| |
|
| *'''6-Star Appearance Rate:''' 2%
| | === New Characters on Pool === |
| *'''5-Star Appearance Rate:''' 10%
| | Whenever a new character is added to the game, typically through their debut rate-up banner, non-limited characters become available in the Standard Scouting pool for flyers and referrals, while limited characters are added to referrals. |
| *'''4-Star Appearance Rate:''' 50%
| |
| *'''3-Star Appearance Rate:''' 38%
| |
|
| |
|
| === Pick Up Rates===
| | When characters debut via a pick-up banner, they tend to be kept exclusive to that banner until it is concluded. |
| <ul>
| |
| <li> Pick up units get 1% rate up each, taken from the 3 star appearance rate. </li>
| |
| <li> Release Celebration Pick Up 2 gave Billford a 2% rate up. </li>
| |
| </ul>
| |
|
| |
|
| ===Standard Scouting Pool=== | | == Scout Pools for Premium Scout Items == |
| <span class="mw-customtoggle-1" style="font-size:small; display:inline-block;"><span class="mw-customtoggletext">[Show/hide]</span></span>
| | Premium Scout Items are typically available in the shop and refer to banners for their pools. They do not have an expiry. |
| <div class="mw-collapsible mw-collapsed">
| |
| <pre>
| |
| ★6 Appearance Rate 2% (22)
| |
| Jinnosuke / Zacharoff / Siddeley / Jalam
| |
| Theodor / Thomas / Bashkar / Bart
| |
| Billford / Edgar / Rasho/ Pino
| |
| Dakkar/ Volund / Equus / Jade
| |
| Kafka / Hellion / Rougarou
| |
| Anima / Azmond / Forte
| |
|
| |
|
| ★5 Appearance Rate 10% (20)
| | For more information, refer to [[Shop History]] and [[Banner History]], respectively. |
| Rook / Sol / Brute / Hulk
| |
| Wrecker / Morgan / Yabsakha / Ragnar
| |
| Romanes / Sarutobi / Hanzo / Harimau
| |
| Stalon / Barlitz / Corca / Beelzebub
| |
| Rothhart / Gordov / Dward / Pius
| |
|
| |
|
| ★4 Appearance Rate 50% (14)
| | === Partner Referrals === |
| Kagura / Karetovi / Lute / Thorkell
| | Partner Referrals grant you a random pull with a selection of units in a particular rarity, usually up to the latest one available when the referral is released. |
| Nitro / Patty / Fu / Pugi
| |
| Rai / Leonhart / Ornis/ Alec
| |
| Lisa / Walther
| |
|
| |
|
| ★3 Appearance Rate 34% (13)
| | === Partner Scout Tickets === |
| Arcana / Elaine / Gymnos / Dyne
| | Partner Scout Tickets grants you a specific unit within a selection in a particular rarity. It has the latest Standard Scouting characters and Limited Characters released 6 months ago. |
| Baran / Bantu / Flet / Charlotte
| |
| Yurt / Robin / Amorey / Seals
| |
| Kongoh
| |
| </pre>
| |
| </div>
| |
| <div style="display:inline-table;">
| |
| {| class="wikitable" style="text-align:center; vertical-align:bottom; background-color:#F8F9FA;"
| |
| |- style="font-weight:bold; background-color:#EAECF0;"
| |
| ! colspan="3" style="width: 200px;" |Pre-Anniversary Pickup 2
| |
| |- style="font-weight:bold; background-color:#EAECF0;"
| |
| | style="width: 10px" |Character
| |
| | style="text-align:center; width: 100px" |Rates (Single)
| |
| !Rates (Multi)
| |
| |-
| |
| |[[File:FS_forte.png|50px]][[Forte]]
| |
| |1.091%
| |
| |
| |
| {| class="wikitable mw-collapsible mw-collapsed"
| |
| |+
| |
| !Scouts
| |
| !Chance to Obtain
| |
| |-
| |
| |10
| |
| |10.39%
| |
| |-
| |
| |20
| |
| |19.70%
| |
| |-
| |
| |30
| |
| |28.04%
| |
| |-
| |
| |40
| |
| |35.52%
| |
| |-
| |
| |50
| |
| |42.22%
| |
| |-
| |
| |60
| |
| |48.22%
| |
| |-
| |
| |70
| |
| |53.60%
| |
| |-
| |
| |80
| |
| |58.42%
| |
| |-
| |
| |90
| |
| |62.74%
| |
| |-
| |
| |100
| |
| |66.61%
| |
| |-
| |
| |120
| |
| |73.19%
| |
| |-
| |
| |140
| |
| |78.47%
| |
| |-
| |
| |160
| |
| |82.71%
| |
| |-
| |
| |180
| |
| |86.12%
| |
| |-
| |
| |200
| |
| |88.85%
| |
| |-
| |
| |240
| |
| |92.81%
| |
| |-
| |
| |400
| |
| |98.76%
| |
| |}
| |
| |-
| |
| |[[File:FS_wrecker.png|50px]][[Wrecker]]
| |
| |1.500%
| |
| |
| |
| {| class="wikitable mw-collapsible mw-collapsed"
| |
| |+
| |
| !Scouts
| |
| !Chance to Obtain
| |
| |-
| |
| |10
| |
| |14.03%
| |
| |-
| |
| |20
| |
| |26.09%
| |
| |-
| |
| |30
| |
| |36.45%
| |
| |-
| |
| |40
| |
| |45.37%
| |
| |-
| |
| |50
| |
| |53.03%
| |
| |-
| |
| |60
| |
| |59.62%
| |
| |-
| |
| |70
| |
| |65.28%
| |
| |-
| |
| |80
| |
| |70.15%
| |
| |-
| |
| |90
| |
| |74.34%
| |
| |-
| |
| |100
| |
| |77.94%
| |
| |-
| |
| |120
| |
| |83.69%
| |
| |-
| |
| |140
| |
| |87.95%
| |
| |-
| |
| |160
| |
| |91.09%
| |
| |-
| |
| |180
| |
| |93.42%
| |
| |-
| |
| |200
| |
| |95.13%
| |
| |-
| |
| |300
| |
| |97.34%
| |
| |-
| |
| |400
| |
| |99.76%
| |
| |}
| |
| |-
| |
| |[[File:FS_sarutobi.png|50px]] [[Sasuke_Sarutobi|Sarutobi]]
| |
| |1.500%
| |
| |
| |
| {| class="wikitable mw-collapsible mw-collapsed"
| |
| |+
| |
| !Scouts
| |
| !Chance to Obtain
| |
| |-
| |
| |10
| |
| |14.03%
| |
| |-
| |
| |20
| |
| |26.09%
| |
| |-
| |
| |30
| |
| |36.45%
| |
| |-
| |
| |40
| |
| |45.37%
| |
| |-
| |
| |50
| |
| |53.03%
| |
| |-
| |
| |60
| |
| |59.62%
| |
| |-
| |
| |70
| |
| |65.28%
| |
| |-
| |
| |80
| |
| |70.15%
| |
| |-
| |
| |90
| |
| |74.34%
| |
| |-
| |
| |100
| |
| | 77.94%
| |
| |-
| |
| |120
| |
| |83.69%
| |
| |-
| |
| |140
| |
| |87.95%
| |
| |-
| |
| |160
| |
| |91.09%
| |
| |-
| |
| |180
| |
| |93.42%
| |
| |-
| |
| |200
| |
| |95.13%
| |
| |-
| |
| |300
| |
| |97.34%
| |
| |-
| |
| |400
| |
| |99.76%
| |
| |}
| |
| |-
| |
| |[[File:FS_karetovi.png|50px]]
| |
| [[Karetovi]]
| |
| |4.571%
| |
| |
| |
| {| class="wikitable mw-collapsible mw-collapsed"
| |
| |+
| |
| !Scouts
| |
| !Chance to Obtain
| |
| |-
| |
| |10
| |
| |37.37%
| |
| |-
| |
| |20
| |
| |60.77%
| |
| |-
| |
| |30
| |
| |
| |
| 75.43%
| |
| |-
| |
| |40
| |
| |84.61%
| |
| |-
| |
| |50
| |
| |90.36%
| |
| |-
| |
| |60
| |
| |93.96%
| |
| |-
| |
| |70
| |
| |96.22%
| |
| |-
| |
| |80
| |
| |97.63%
| |
| |-
| |
| | 90
| |
| |98.52%
| |
| |-
| |
| |100
| |
| |99.07%
| |
| |-
| |
| |120
| |
| |99.64%
| |
| |-
| |
| |140
| |
| |99.86%
| |
| |-
| |
| |160
| |
| |99.94%
| |
| |-
| |
| |180
| |
| |99.98%
| |
| |-
| |
| |200
| |
| |99.99%
| |
| |-
| |
| |300
| |
| |100.00%
| |
| |-
| |
| |400
| |
| |100.00%
| |
| |}
| |
| |-
| |
| | Off-Banner ★6
| |
| |0.091%
| |
| |
| |
| |-
| |
| |Off-Banner ★5
| |
| |0.500%
| |
| |
| |
| |-
| |
| |Off-Banner ★4
| |
| |3.571%
| |
| |
| |
| |-
| |
| |Off-Banner ★3
| |
|
| |
|
| |2.615%
| | === Recommendation Letters === |
| |
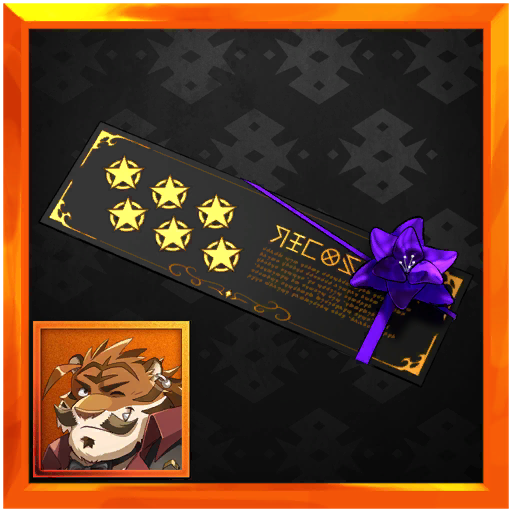
| | Recommendation Letters grant you a specific unit. Most letters are instantly used, with the only exception being Edgar's. |
| |}
| | {| class="wikitable" |
| </div>
| | !Character |
| <div style="display:inline-table;">
| | !Acquired From: |
| {| class="wikitable" style="text-align:center; vertical-align:bottom; background-color:#F8F9FA;"
| |
| |- style="font-weight:bold; background-color:#EAECF0;"
| |
| ! colspan="3" style="width: 200px;" |Pre-Anniversary Pickup 1
| |
| |- style="font-weight:bold; background-color:#EAECF0;"
| |
| | style="width: 10px" |Character
| |
| | style="text-align:center; width: 100px" |Rates (Single)
| |
| !Rates (Multi)
| |
| |-
| |
| |[[File:FS_thomas.png|50px]] [[Thomas]]
| |
| |1.091%
| |
| |
| |
| {| class="wikitable mw-collapsible mw-collapsed" | |
| |+
| |
| !Scouts | |
| !Chance to Obtain
| |
| |-
| |
| |10
| |
| |10.39%
| |
| |-
| |
| |20
| |
| |19.70%
| |
| |-
| |
| |30
| |
| |28.04%
| |
| |-
| |
| |40
| |
| |35.52%
| |
| |-
| |
| |50
| |
| |42.22%
| |
| |-
| |
| |60
| |
| |48.22%
| |
| |-
| |
| |70
| |
| |53.60%
| |
| |-
| |
| |80
| |
| |58.42%
| |
| |-
| |
| |90
| |
| |62.74%
| |
| |-
| |
| |100
| |
| |66.61%
| |
| |-
| |
| |120
| |
| |73.19%
| |
| |-
| |
| |140
| |
| |78.47%
| |
| |-
| |
| |160
| |
| |82.71%
| |
| |-
| |
| |180
| |
| |86.12%
| |
| |-
| |
| |200
| |
| |88.85%
| |
| |-
| |
| |240
| |
| |92.81%
| |
| |-
| |
| |400
| |
| |98.76%
| |
| |}
| |
| |-
| |
| |[[File:FS_sol.png|50px]][[Sol]]
| |
| |1.500%
| |
| |
| |
| {| class="wikitable mw-collapsible mw-collapsed"
| |
| |+
| |
| ! Scouts
| |
| !Chance to Obtain
| |
| |-
| |
| |10
| |
| | 14.03%
| |
| |-
| |
| |20
| |
| |26.09%
| |
| |-
| |
| |30
| |
| |36.45%
| |
| |-
| |
| |40
| |
| |45.37%
| |
| |-
| |
| |50
| |
| |53.03%
| |
| |-
| |
| |60
| |
| |59.62%
| |
| |-
| |
| |70
| |
| |65.28%
| |
| |-
| |
| |80
| |
| |70.15%
| |
| |-
| |
| |90
| |
| |74.34%
| |
| |-
| |
| |100
| |
| |77.94%
| |
| |-
| |
| |120
| |
| |83.69%
| |
| |-
| |
| |140
| |
| |87.95%
| |
| |-
| |
| |160
| |
| |91.09%
| |
| |-
| |
| |180
| |
| |93.42%
| |
| |-
| |
| |200
| |
| |95.13%
| |
| |-
| |
| |300
| |
| |97.34%
| |
| |-
| |
| |400
| |
| |99.76%
| |
| |}
| |
| |-
| |
| |[[File:FS_gordov.png|50px]] [[Gordov]]
| |
| |1.500%
| |
| |
| |
| {| class="wikitable mw-collapsible mw-collapsed"
| |
| |+
| |
| !Scouts | |
| !Chance to Obtain
| |
| |-
| |
| |10
| |
| |14.03%
| |
| |-
| |
| |20
| |
| |26.09%
| |
| |-
| |
| |30
| |
| |36.45%
| |
| |-
| |
| |40
| |
| | 45.37%
| |
| |-
| |
| |50
| |
| |53.03%
| |
| |-
| |
| |60
| |
| | 59.62%
| |
| |-
| |
| |70
| |
| |65.28%
| |
| |-
| |
| |80
| |
| |70.15%
| |
| |-
| |
| |90
| |
| |74.34%
| |
| |-
| |
| |100
| |
| |77.94%
| |
| |-
| |
| |120
| |
| |
| |
| 83.69%
| |
| |-
| |
| |140
| |
| |87.95%
| |
| |-
| |
| |160
| |
| |91.09%
| |
| |-
| |
| |180
| |
| |93.42%
| |
| |-
| |
| |200
| |
| |95.13%
| |
| |-
| |
| |300
| |
| |97.34%
| |
| |-
| |
| |400
| |
| |99.76%
| |
| |}
| |
| |-
| |
| |[[File:FS_walther.png|50px]] [[Walther]]
| |
| |4.571%
| |
| |
| |
| {| class="wikitable mw-collapsible mw-collapsed"
| |
| |+
| |
| !Scouts
| |
| !Chance to Obtain
| |
| |-
| |
| |10
| |
| |37.37%
| |
| |-
| |
| |20
| |
| |60.77%
| |
| |-
| |
| |30
| |
| |
| |
| 75.43%
| |
| |-
| |
| |40
| |
| |84.61%
| |
| |-
| |
| |50
| |
| |90.36%
| |
| |-
| |
| |60
| |
| |93.96%
| |
| |-
| |
| |70
| |
| |96.22%
| |
| |-
| |
| |80
| |
| |97.63%
| |
| |-
| |
| |90
| |
| | 98.52%
| |
| |-
| |
| |100
| |
| |99.07%
| |
| |- | | |- |
| |120 | | |[[Edgar]] |
| |99.64% | | |Shop |
| |- | | |- |
| |140 | | |[https://anothereidoswiki.ddns.net/index.php/Gaia Gaia], [https://anothereidoswiki.ddns.net/index.php/Amorey Amorey], [https://anothereidoswiki.ddns.net/index.php/Barboros Barboros] |
| |99.86% | | |0-4 |
| |- | | |- |
| |160 | | |[https://anothereidoswiki.ddns.net/index.php/Elaine Elaine] |
| |99.94% | | |0-5 |
| |- | | |- |
| |180 | | |[https://anothereidoswiki.ddns.net/index.php/Mage_Goblin Mage Goblin], [https://anothereidoswiki.ddns.net/index.php/Goblin_Archer Goblin Archer], [https://anothereidoswiki.ddns.net/index.php/Goblin_Fighter Goblin Fighter] |
| |99.98% | | |0-7 |
| |- | | |- |
| |200 | | |[https://anothereidoswiki.ddns.net/index.php/Leonhart Leonhart], [https://anothereidoswiki.ddns.net/index.php/Robin Robin] |
| |99.99% | | |0-31 |
| |- | | |- |
| | 300 | | |[https://anothereidoswiki.ddns.net/index.php/Barboros_(New_Look) Barboros (New Look)] |
| |100.00% | | |3-27 |
| |- | | |- |
| |400 | | |[[Gaia (Awakened)]] |
| |100.00% | | |5-34 |
| |} | | |} |
| |-
| | == Recruitment Flyers == |
| |Off-Banner ★6
| | These are common drops from story/event quests that can recruit characters of any rarity. Notably, the only way to obtain the most 1★ and 2★ characters and the odds of getting any character above three starts are weighted very low. |
| |0.091%
| |
| |
| |
| |-
| |
| |Off-Banner ★5
| |
| |0.500%
| |
| |
| |
| |-
| |
| |Off-Banner ★4
| |
| |3.571%
| |
| |
| |
| |-
| |
| |Off-Banner ★3
| |
|
| |
|
| |2.615%
| | '''It is advised not to farm specifically for flyers.''' |
| |
| |
| |}
| |
| </div>
| |
| <div style="display:inline-table;">
| |
| {| class="wikitable" style="text-align:center; vertical-align:bottom; background-color:#F8F9FA;"
| |
| |- style="font-weight:bold; background-color:#EAECF0;"
| |
| ! colspan="3" style="width: 200px;" |Bright Summer Fest Pickup 4
| |
| |- style="font-weight:bold; background-color:#EAECF0;"
| |
| | style="width: 10px" |Character
| |
| | style="text-align:center; width: 100px" |Rates (Single)
| |
| !Rates (Multi)
| |
| |-
| |
| |[[File:FS_pugi_summer.png|50px]] [[Pugi (Summer)]]
| |
| |1.083%
| |
| |
| |
| {| class="wikitable mw-collapsible mw-collapsed"
| |
| |+
| |
| !Scouts
| |
| !Chance to Obtain
| |
| |-
| |
| |10
| |
| |10.32%
| |
| |-
| |
| | 20
| |
| |19.58%
| |
| |-
| |
| |30
| |
| |27.88%
| |
|
| |
|
| |-
| | ===Flyer Drop Rates=== |
| |40
| | There are four types of flyers that recruit a certain number of characters depending on the tier. There is a total 90% chance to drop any of these items through only Story and Event quests. |
| |35.32%
| |
| |-
| |
| |50
| |
| |41.99%
| |
| |-
| |
| |60
| |
| |47.98%
| |
| |-
| |
| |70
| |
| |53.35%
| |
| |-
| |
| |80
| |
| |58.16%
| |
| |-
| |
| |90
| |
| |62.48%
| |
| |-
| |
| |100
| |
| |66.35%
| |
| |-
| |
| |120
| |
| |72.94%
| |
| |-
| |
| |140
| |
| |78.24%
| |
| |-
| |
| |160
| |
| |82.50%
| |
| |-
| |
| |180
| |
| |85.92%
| |
| |-
| |
| |200
| |
| |88.68%
| |
| |-
| |
| |300
| |
| |96.19%
| |
| |-
| |
| |
| |
| 400
| |
| |98.72%
| |
| |}
| |
| |-
| |
| |[[File:FS_lute_summer.png|50px]][[Lute (Summer)]]
| |
| |1.083%
| |
| |
| |
| {| class="wikitable mw-collapsible mw-collapsed"
| |
| |+
| |
| !Scouts
| |
| !Chance to Obtain
| |
| |-
| |
| |10
| |
| |10.32%
| |
| |-
| |
| |20
| |
| |19.58%
| |
| |-
| |
| |30
| |
| |27.88%
| |
| |-
| |
| |40
| |
| |35.32%
| |
| |-
| |
| |50
| |
| |41.99%
| |
| |-
| |
| |60
| |
| |47.98%
| |
| |-
| |
| |70
| |
| |53.35%
| |
| |-
| |
| |80
| |
| |58.16%
| |
| |-
| |
| |90
| |
| |62.48%
| |
| |-
| |
| |100
| |
| |66.35%
| |
| |-
| |
| |120
| |
| |72.94%
| |
| |-
| |
| |140
| |
| |78.24%
| |
| |-
| |
| |160
| |
| |82.50%
| |
| |-
| |
| |180
| |
| |85.92%
| |
| |-
| |
| |200
| |
| |88.68%
| |
| |-
| |
| |300
| |
| |96.19%
| |
| |-
| |
| |400
| |
| |98.72%
| |
| |}
| |
| |-
| |
| |[[File:FS_billford_summer.png|50px]] [[Billford (Summer)]]
| |
| |1.476%
| |
| |
| |
| {| class="wikitable mw-collapsible mw-collapsed"
| |
| |+
| |
| !Scouts
| |
| !Chance to Obtain
| |
| |-
| |
| |10
| |
| |13.82%
| |
| |-
| |
| | 20
| |
| |25.73%
| |
| |-
| |
| |30
| |
| |35.99%
| |
| |-
| |
| |40
| |
| |44.84%
| |
| |-
| |
| |50
| |
| |52.46%
| |
| |-
| |
| |60
| |
| |59.03%
| |
| |-
| |
| |70
| |
| |64.69%
| |
| |-
| |
| |80
| |
| |69.57%
| |
| |-
| |
| |90
| |
| |73.78%
| |
| |-
| |
| |100
| |
| |77.40%
| |
| |-
| |
| |120
| |
| |83.21%
| |
| |-
| |
| |140
| |
| |87.53%
| |
| |-
| |
| |160
| |
| |90.74%
| |
| |-
| |
| |180
| |
| |93.12%
| |
| |-
| |
| |200
| |
| |94.89%
| |
| |-
| |
| |300
| |
| | 98.85%
| |
| |-
| |
| |400
| |
| |99.74%
| |
| |}
| |
| |-
| |
| |Off-Banner ★6
| |
| | 0.083%
| |
| |
| |
| |-
| |
| |Off-Banner ★5
| |
| |0.476%
| |
| |
| |
| |-
| |
| |Off-Banner ★4
| |
| |3.571%
| |
| |
| |
| |-
| |
| |Off-Banner ★3
| |
| |2.692%
| |
| |
| |
| |}
| |
| </div>
| |
| <div style="display:inline-table">
| |
| {| class="wikitable" style="text-align:center; vertical-align:bottom; background-color:#F8F9FA;"
| |
| |- style="font-weight:bold; background-color:#EAECF0;"
| |
| ! colspan="3" style="width: 200px;" | Bright Summer Fest Pickup 3
| |
| |- style="font-weight:bold; background-color:#EAECF0;"
| |
| | style="width: 10px" |Character
| |
| | style="text-align:center; width: 100px" |Rates (Single)
| |
| !Rates (Multi)
| |
| |-
| |
| |[[File:FS_ragnar_summer.png|50px]] [[Ragnar (Summer)]]
| |
| |1.083%
| |
| |
| |
| {| class="wikitable mw-collapsible mw-collapsed"
| |
| |+
| |
| !Scouts
| |
| !Chance to Obtain
| |
| |-
| |
| |10
| |
| |10.32%
| |
| |-
| |
| |20
| |
| |19.58%
| |
| |-
| |
| |
| |
| 30
| |
| | 27.88%
| |
| |-
| |
| |40
| |
| |35.32%
| |
| |-
| |
| |50
| |
| |41.99%
| |
| |-
| |
| | 60
| |
| |47.98%
| |
| |-
| |
| |70
| |
| |53.35%
| |
| |-
| |
| |80
| |
| |58.16%
| |
| |-
| |
| |90
| |
| | 62.48%
| |
| |-
| |
| | 100
| |
| |66.35%
| |
| |-
| |
| | 120
| |
| | 72.94%
| |
| |-
| |
| |140
| |
| |78.24%
| |
| |-
| |
| | 160
| |
| | 82.50%
| |
| |-
| |
| | 180
| |
| |85.92%
| |
| |-
| |
| | 200
| |
| |88.68%
| |
| |-
| |
| |300
| |
| |96.19%
| |
| |-
| |
| |400
| |
| |98.72%
| |
| |}
| |
| |-
| |
| |[[File:FS_brute_summer.png|50px]][[Brute (Summer)]]
| |
| |1.083%
| |
| |
| |
| {| class="wikitable mw-collapsible mw-collapsed"
| |
| |+
| |
| !Scouts
| |
| !Chance to Obtain
| |
| |-
| |
| |10
| |
| |10.32%
| |
| |-
| |
| |20
| |
| | 19.58%
| |
| |-
| |
| |30
| |
| |27.88%
| |
| |-
| |
| | 40
| |
| |35.32%
| |
| |-
| |
| |50
| |
| |41.99%
| |
| |-
| |
| | 60
| |
| |47.98%
| |
| |-
| |
| |70
| |
| |53.35%
| |
| |-
| |
| |80
| |
| |58.16%
| |
| |-
| |
| |90
| |
| |
| |
| 62.48%
| |
| |-
| |
| |100
| |
| |66.35%
| |
| |-
| |
| |120
| |
| |72.94%
| |
| |-
| |
| |140
| |
| |78.24%
| |
| |-
| |
| | 160
| |
| | 82.50%
| |
| |-
| |
| |180
| |
| |85.92%
| |
| |-
| |
| |200
| |
| |88.68%
| |
| |-
| |
| |300
| |
| |96.19%
| |
| |-
| |
| | 400
| |
| | 98.72%
| |
| |}
| |
| |-
| |
| |[[File:FS nitro_summer.png|50x50px]] [[Nitro (Summer)]]
| |
| |1.476%
| |
| |
| |
| {| class="wikitable mw-collapsible mw-collapsed"
| |
| |+
| |
| !
| |
| Scouts
| |
| ! Chance to Obtain
| |
| |-
| |
| |10
| |
| | 13.82%
| |
| |-
| |
| |20
| |
| |25.73%
| |
| |-
| |
| |30
| |
| |
| |
| 35.99%
| |
| |-
| |
| |40
| |
| | 44.84%
| |
| |-
| |
| | 50
| |
| |52.46%
| |
| |-
| |
| |60
| |
| |59.03%
| |
| |-
| |
| |
| |
| 70
| |
| |64.69%
| |
| |-
| |
| |80
| |
| |69.57%
| |
| |-
| |
| | 90
| |
| |73.78%
| |
| |-
| |
| |100
| |
| |77.40%
| |
| |-
| |
| | 120
| |
| |83.21%
| |
| |-
| |
| |140
| |
| |87.53%
| |
| |-
| |
| | 160
| |
| |90.74%
| |
| |-
| |
| |180
| |
| |93.12%
| |
| |-
| |
| |200
| |
| |94.89%
| |
| |-
| |
| |300
| |
|
| |
|
| |98.85% | | They can also be obtained through event shops. Quest Stamina cost does not affect drop rates. |
| | {| class="wikitable" style="vertical-align:middle; background-color:#F8F9FA; color:#202122;" |
| | |- style="font-weight:bold; text-align:center; background-color:#EAECF0;" |
| | !Item |
| | !Number of Scouts |
| | ! Drop Rate |
| |- | | |- |
| | | | | style="color:#002BB8;" |[[File:BlankRecruitingFlyer.png|50px]] |
| 400
| | |10 Blank Flyers scouts 1 character. |
| | 99.74% | | | style="text-align:center;" | 65% |
| |} | |
| |- | | |- |
| |Off-Banner ★6 | | | style="color:#002BB8;" |[[File:AdventurerRecruitingFlyer.png|50px]] |
| |0.083% | | | 1 Green Flyer scouts 1 character. |
| | | | | style="text-align:center;" |14% |
| |- | | |- |
| |Off-Banner ★5 | | | style="color:#002BB8;" |[[File:AdventurerRecruitingFlyer2.png|50px]] |
| |0.476% | | |1 Blue Flyer scouts 2 characters. |
| | | | | style="text-align:center;" |8% |
| |- | | |- |
| |Off-Banner ★4 | | | style="color:#002BB8;" |[[File:AdventurerRecruitingFlyer3.png|50px]] |
| |3.571% | | |1 Purple Flyer scouts 3 characters. |
| | | | | style="text-align:center;" |3% |
| |- | |
| |Off-Banner ★3 | |
| | 2.692% | |
| |
| |
| |} | | |} |
| </div>
| | ===Flyer Scout Rates=== |
| <div style="display:inline-table"></div>
| |
| <div style="display:inline-table"></div>
| |
| ===Why am I not getting a featured rare character?=== | |
| [[File:Example 300 Scouts For Billford.jpg|thumb|475x475px|Obtaining featured characters can be difficult, even as a 5-star. In this example it took 300 scouts (1200 stones) to scout the featured 5-star【Water-Fun Captain】Billford. Take note of the many off-banner rares and other featured characters that were scouted before he was.]]
| |
| The ''Another Eidos'' premium scouting system centers around the concept of "All featured characters have rates greater than 1%." This is achieved by simply adding 1% to the featured characters' standard rate. The standard rate for a specific character is just the standard rate for their rarity divided by the number of characters within that rarity. The standard rates for 5 and 6 stars are low and the number of 5 and 6 stars is high, as a result there isn't much difference between scouting for a specific 5 star or a specific 6 star. At the time of writing this, the difference between scouting a specific 5 and 6 star is only 0.37%. When featured, both of 5 and 6 star rates only have 1% added to them, the difference between scouting a featured 5 and 6 star is still only 0.37%. As the number of 5 and 6 stars increase the closer the rates for a specific 5 and 6 star will become.
| |
| | |
| You may notice you scouted more featured 6 stars than featured 5 stars or that you scouted the featured 6 star before the featured 5 star. This doesn't mean the featured 5 star is more "difficult" to scout than a 6 star. 6 stars will always be more difficult to scout than 5 stars. What you are experiencing is a cognitive bias called "insensitivity to sample size." Variations from the norm will occur at smaller sample sizes. You may spend 400 stones obtaining unfeatured characters or characters you don't want, but this often isn't enough to detect the small difference of 0.37% between specific featured characters. Additionally, the odds of getting any off-banner 6 star is actually higher than the odds of getting a featured 5 or 6 star. This is because the standard rate for any 6 star is 2%, which will always be higher than a specific featured characters' rate. Obtaining an off-banner 6 star before the featured 6 star is completely normal, it just might not be the one you want. Same goes for 5 stars which have an off-banner rate of 10%, your chances of obtaining an off-banner 5 star are much greater than your chances of obtaining any featured one.
| |
| | |
| So basically don't pay too much attention to a featured 5 or 6 star character's rarity, it doesn't make too much of a difference while on-banner.
| |
| | |
| ===Calculations===
| |
| To calculate the odds of scouting a specific unit use the following equation:
| |
| R = S/T, where
| |
| R = Odds of scouting a specific unit in a single pull
| |
| S = Standard rate for a unit's rarity on the banner you're currently scouting
| |
| T = Total number of units currently with the same rarity on that banner
| |
| '''If the unit is currently "Rate Up" on the banner add +1% to their calculated odds.'''
| |
| | |
| To calculate the probability of scouting a specific unit in N pulls at least once use the following equation:
| |
| P = 1-((100%-R)^N), where
| |
| P = Probability of scouting the unit at least once
| |
| R = The odds of scouting a specific unit in a single pull
| |
| N = number of single pulls
| |
| An Example
| |
| <pre>
| |
| Anima's Single Rate Calculation on the "Investigate the Endless Mating Season!" Pick Up
| |
| R = S / T
| |
| R = 2% / 20
| |
| R = 0.10%
| |
| Add +1% because he has rate up = 1.10%
| |
| | |
| Odds of obtaining at least one Anima in 10 of pulls on the "Investigate the Endless Mating Season!" Pick up.
| |
| P = 1-((100%-R)^N)
| |
| P = 1-((1-.011)^10)
| |
| P = 10.47%
| |
| | |
| Odds of obtaining at least one Anima in 20 of pulls on the "Investigate the Endless Mating Season!" Pick up.
| |
| P = 1-((100%-R)^N)
| |
| P = 1-((1-.011)^20)
| |
| P = 19.85%
| |
| </pre>
| |
| | |
| ==Partner Referrals==
| |
| [[File:Referral1.png|50px]][[File:Referral2.png|50px]][[File:Referral3.png|50px]][[File:Referral4.png|50px]][[File:Referral5.png|50px]][[File:Referral6.png|50px]][[File:SwimsuitTicket.png|50x50px]]
| |
| | |
| Partner Referrals allow you to scout a unit of a specifi pool at random. Partner referrals do not expire.
| |
| | |
| *Some of these are currently available from purchasing specific bundles.
| |
| *It is currently unclear if the pool from Partner Referral is updated with new units, or not.
| |
| *An inquiry was submitted to Habbit asking if Partner Referral tickets include new units, Habbit responded "We would like to inform you that we do not currently disclose the probability rate for Partner Referral tickets."
| |
| | |
| ==Partner Scout Tickets==
| |
| [[File:PartnerScout1.png|50px]][[File:PartnerScout2.png|50px]][[File:PartnerScout3.png|50px]][[File:PartnerScout4.png|50px]][[File:PartnerScout5.png|50px]][[File:PartnerScout6.png|50px]]
| |
| | |
| Partner Scout Tickets allow you to choose any unit you desire of corresponding rarity. Units are limited to the pool on ticket's description. Partner Scout Tickets do not expire.
| |
| | |
| *Most of these were purchasable in the shop during Half-Anniversary Event.
| |
| | |
| ==Recommendation Letters==
| |
| [[File:Recommendation Letter Edgar.png|50x50px]]
| |
| | |
| Recommendation letters let you scout a specific unit. Currently there is only one obtainable Recommendation Letter, it can be bought from the shop as part of the Edgar Pack. To use a recommendation letter it must be activated from your warehouse.
| |
| | |
| Otherwise they are shown on the rewards screen for several Chapter 0 quests and are immediately redeemed when added to your warehouse. Recommendation Letters do not expire.
| |
| | |
| ==Limited Scouting==
| |
| Specific events have characters that are only obtainable through specific banners through Scouting, and referrals, letters, and tickets through Shop.
| |
| | |
| ==Banner History==
| |
| | |
| ==== 2022 Banners====
| |
| {| class="wikitable" | | {| class="wikitable" |
| !Banner Image | | !Rarity |
| !Pick-up Name | | !Quantity |
| !Nation Focus | | !Estimated Rate |
| !Pick-ups
| |
| !Duration (JST)
| |
| |- | | |- |
| | [[File:Housing PickUP 021 single EN-1.png|300x300px]] | | | style="text-align:center;" |'''1★''' |
| |Pre-Anniversary Pick Up! 1 | | | style="text-align:center;" | |
| |N/A | | 1690 |
| |
| | | style="text-align:center;" |24% |
| *[[Thomas]]
| |
| * [[Sol]]
| |
| *[[Gordov]]
| |
| *[[Walther]]
| |
| |11/25/2022-01/16/2023 | |
| |- | | |- |
| |[[File:Housing PickUP 020 single EN.jpg|300x300px]] | | | style="text-align:center;" |'''2★''' |
| |Undercover Darkroom Investigation!
| | | style="text-align:center;" |2417 |
| |N/A
| | | style="text-align:center;" |35% |
| | | |
| *'''[[Billford (Summer)]]'''
| |
| *'''[[Pugi (Summer)]]'''
| |
| *'''[[Lute (Summer)]]''' ''(These are limited units exclusive to this pick-up)''
| |
| |11/11/2022-12/23/2022 | |
| |- | | |- |
| |[[File:Housing PickUP 019 single EN-1.jpg|300x300px]] | | | style="text-align:center;" |'''3★''' |
| |
| | | style="text-align:center;" |2849 |
| Good Vibrations! Party 'Til the Break of Dawn! Tonight!
| | | style="text-align:center;" |40% |
| |N/A
| |
| |
| |
| *'''[[Nitro (Summer)]]'''
| |
| *'''[[Brute (Summer)]]'''
| |
| *'''[[Ragnar (Summer)]]''' ''(These are limited units exclusive to this pick-up)''
| |
| | |
| |10/28/2022 - 12/23/2022 | |
| |- | | |- |
| |[[File:Housing PickUP 018 single EN.jpg|300x300px]] | | | style="text-align:center;" |'''4★''' |
| |Hot Memories This Summer! Master of the Beach!
| | | style="text-align:center;" | 37 |
| |N/A
| | | style="text-align:center;" |0.50% |
| |
| |
| * '''[[Jalam (Summer)]]'''
| |
| *'''[[Hanzo (Summer)]]'''
| |
| *'''[[Flet (Summer)]]'''
| |
| | |
| ''(These are limited units exclusive to this pick-up)''
| |
| |10/14/2022 - 11/25/2022 | |
| |- | | |- |
| |[[File:BSF D pickup01 EN.jpg|300x300px]] | | | style="text-align:center;" |'''5★''' |
| |Sexy G-Men Deployed! Protect the Peace of the Cruisin' Beach!
| | | style="text-align:center;" |6 |
| |N/A
| | | style="text-align:center;" |0.10% |
| |
| |
| *'''[[Leonhart (Summer)]]'''
| |
| *'''[[Rai (Summer)]]'''
| |
| *'''[[Fu (Summer)]]'''
| |
| | |
| ''(These are limited units exclusive to this pick-up)''
| |
| | | |
| 9/30/2022 - 11/25/2022
| |
| |- | | |- |
| |[[File:PickUP016 EN-1024x576.jpg|300x300px]] | | | style="text-align:center;" |'''6★''' |
| |
| | | style="text-align:center;" |1 |
| XXX 5 Seconds After Having Met!
| | | style="text-align:center;" | 0.02% |
| |Verdancia
| | |} |
| |'''[[Azmond]], [[Forte]],''' [[Hulk]], [[Wrecker]] | |
| ''(Walter, Pius and Anima are not in the pool)''
| |
| | | |
| 9/9/2022 - 10/7/2022
| |
| |- | |
| | [[File:PickUP015 EN.jpg|300x300px]] | |
| |
| |
| Investigate the Endless Mating Season!
| |
| |Verdancia | |
| |'''[[Walther]],''' [[Pugi]], [[Lute]], '''[[Pius]],''' [[Siddeley]], '''[[Anima]]'''
| |
| ''(Azmond and Forte are not in the pool)''
| |
| |8/19/2022 - 10/7/2022
| |
|
| |
|
| |-
| | ==Premium Scouting == |
| |[[File:PickUP014 EN.jpg|300x300px]]
| | This is the typical way of obtaining characters, drawing from a pool of 3★ to 6★ characters with a few specified to have a +1% increased rate as their "pick-up rate." This rate draws from the pick-up rate of 3★. |
| |Pervert Monster Championship!!
| |
| |Obsidonia
| |
| |[[Bashkar]], '''[[Dward]],''' [[Dyne]]. [[Bantu]]
| |
| (''Rougarou and Gordov are not in the pool)''
| |
| |7/29/2022 - 9/9/2022
| |
| |-
| |
| |[[File:PickUP013 EN.jpg|300x300px]]
| |
| |
| |
| No Way I'm Taking Part in Erotic Wrestling!!
| |
| |Obsidonia
| |
| |'''[[Rougarou]], [[Gordov]],''' [[Hulk]]
| |
| ''(Dward is not in the pool)''
| |
| |7/15/2022 - 9/2/2022
| |
| |-
| |
| |[[File:PickUP012 EN.jpg|300x300px]]
| |
| |Half Anniversary
| |
| |N/A
| |
| |'''[[Amorey (Half-Anniversary)]],''' [[Jalam]], [[Zacharoff]], '''[[Hellion (Young)]]'''
| |
| ''(Amorey and Hellion are limited units exclusive to this pick-up;''
| |
| | |
| ''Rougarou and Gordov are not in the pool)''
| |
| |6/24/2022 - 07/29/2022
| |
|
| |
|
| |-
| | Pick-ups give improved chances to scout particular characters by taking a 1% rate up from the 3★ appearance rate for each pick-up character. These banners usually come in pairs, with one coming out delayed by around a week. If there is a new character for a particular banner, it will be exclusive to that banner until it ends. Afterward, they will be part of the standard pool. Characters labeled as "Limited Time Only" are part of limited scouting and will only be available again once their banner reruns. |
| |[[File:Banner5.jpg|300x300px]]
| |
| |Save Thy Lover from Castle of Pandemonium
| |
| |Obsidonia
| |
| |'''[[Hellion]], [[Beelzebub]],''' [[Gymnos]]
| |
| ''(Kafka and Rotthart are not in the pool)''
| |
| |6/10/2022 - 07/23/2022
| |
| |-
| |
| |[[File:Ch2 Pickup01 EN-1 .jpg|link=https://anothereidoswiki.ddns.net/index.php/File:Ch2%20Pickup01%20EN-1%20.jpg|300x300px]]
| |
| |Relief Request from the Emperor Himself
| |
| |Obsidonia
| |
| |'''[https://anothereidoswiki.ddns.net/index.php/Kafka Kafka], [https://anothereidoswiki.ddns.net/index.php/Rothhart Rothhart]''', [https://anothereidoswiki.ddns.net/index.php/Dyne Dyne]
| |
| ''(Hellion and Beelzebub are not in the pool)''
| |
| |5/20/2022 - 07/08/2022
| |
| '''''Extension''''' ''~07/23/2022''
| |
|
| |
|
| |-
| | Due to how the rate up works, there is only roughly a 0.5% rate difference between a rate up to 6★ and a rate up to 5★. |
| |[[File:Banner4.png|link=https://anothereidoswiki.ddns.net/index.php/File:Banner4.png|300x300px]]
| |
| |Azureterra
| |
| |Azureterra
| |
| |[https://anothereidoswiki.ddns.net/index.php/Theodor Theodor],[https://anothereidoswiki.ddns.net/index.php/Bart Bart], [https://anothereidoswiki.ddns.net/index.php/Pino Pino], [https://anothereidoswiki.ddns.net/index.php/Ragnar Ragnar],[https://anothereidoswiki.ddns.net/index.php/Patty Patty], [https://anothereidoswiki.ddns.net/index.php/Thorkell Thorkell], [https://anothereidoswiki.ddns.net/index.php/Lisa '''Lisa''']
| |
| ''(Kafka and Rotthart are not in the pool)''
| |
| |4/29/2022 - 6/3/2022
| |
| |-
| |
| |[[File:Day Banner.jpg|link=https://anothereidoswiki.ddns.net/index.php/File:Day%20Banner.jpg|300x300px]]
| |
| |Day & Night in Pays Blanc 1
| |
| |Pays Blanc
| |
| |'''[https://anothereidoswiki.ddns.net/index.php/Equus Equus], [https://anothereidoswiki.ddns.net/index.php/Barlitz Barlitz]''', [https://anothereidoswiki.ddns.net/index.php/Rook Rook], [https://anothereidoswiki.ddns.net/index.php/Billford Billford]
| |
|
| |
|
| ''(Corca and Jade are not in the pool)''
| | Also, currently, there is no benefit to doing 10 pulls aside from convenience. |
| |3/31/2022 - 5/27/2022
| |
| |-
| |
| |[[File:Day Banner2.jpg|link=https://anothereidoswiki.ddns.net/index.php/File:Day%20Banner2.jpg|300x300px]]
| |
| |Day & Night in Pays Blanc 2
| |
| |Pays Blanc
| |
| |
| |
| '''[https://anothereidoswiki.ddns.net/index.php/Corca Corca], [https://anothereidoswiki.ddns.net/index.php/Jade Jade]''', [https://anothereidoswiki.ddns.net/index.php/Edgar Edgar], [https://anothereidoswiki.ddns.net/index.php/Romanes Romanes]
| |
|
| |
|
| ''(Barlitz and Equus are not in the pool)''
| | * Check [https://anados-collection-tracker.vercel.app/gacha/simulator here] for a gacha simulator. |
| |4/15/2022 - 5/27/2022 | | *For a history of pick-up banners, refer to [[Banner History]]. |
| | *For premium scouting tips, you can refer to [[Tips and Tricks#Premium Scouting Tips|Tips and Tricks]]. |
| | *FAQ: [[FAQ#What are the odds of getting my desired unit?|What are the odds of getting my desired unit?]] |
| | ===Standard Rates=== |
| | {| class="wikitable" style="vertical-align:middle; background-color:#F8F9FA; color:#202122;" |
| | |- style="font-weight:bold; text-align:center; background-color:#EAECF0;" |
| | !Rarity |
| | !Appearance Rate |
| |- | | |- |
| |[[File:Banner.png|link=https://anothereidoswiki.ddns.net/index.php/File:Banner.png|300x300px]] | | |6★ |
| |The Black Emerald
| | |2% |
| |Pays Blanc | |
| |'''[https://anothereidoswiki.ddns.net/index.php/Volund Volund], [https://anothereidoswiki.ddns.net/index.php/Stalon Stalon], [https://anothereidoswiki.ddns.net/index.php/Alec Alec],''' [https://anothereidoswiki.ddns.net/index.php/Yurt Yurt]
| |
| |
| |
| 2/25/2022 - 3/31/2022 | |
| |-
| |
| |[[File:Banner Presidente.jpg|link=https://anothereidoswiki.ddns.net/index.php/File:Banner%20Presidente.jpg|300x300px]]
| |
| |
| |
| Viva El Presidente
| |
| |
| |
| Dragon Isle
| |
| |[https://anothereidoswiki.ddns.net/index.php/Robin Robin], [https://anothereidoswiki.ddns.net/index.php/Leonhart Leonhart], [https://anothereidoswiki.ddns.net/index.php/Harimau '''Harimau'''], [https://anothereidoswiki.ddns.net/index.php/Pino '''Pino'''], [https://anothereidoswiki.ddns.net/index.php/Dakkar '''Dakkar''']
| |
| |1/27/2022 - 2/24/2022
| |
| |- | | |- |
| |[[File:Banner Honor.jpg|link=https://anothereidoswiki.ddns.net/index.php/File:Banner%20Honor.jpg|300x300px]]
| |
| |A New Year for Yamato Honor
| |
| |Yamato
| |
| |'''[https://anothereidoswiki.ddns.net/index.php/Rasho Rasho], [https://anothereidoswiki.ddns.net/index.php/Sasuke_Sarutobi Sasuke Sarutobi],''' [https://anothereidoswiki.ddns.net/index.php/Kagura Kagura], [https://anothereidoswiki.ddns.net/index.php/Kongoh '''Kongoh''']
| |
| | | | | |
| 1/01/2022 - 1/31/2022
| | 5★ |
| | |10% |
| |- | | |- |
| |[[File:Banner Virtue.jpg|link=https://anothereidoswiki.ddns.net/index.php/File:Banner%20Virtue.jpg|300x300px]] | | |4★ |
| |A New Year for Yamato Virtue
| | |50% |
| |Yamato
| |
| |[https://anothereidoswiki.ddns.net/index.php/Jinnosuke Jinnosuke], [https://anothereidoswiki.ddns.net/index.php/Hanzo '''Hanzo'''], [https://anothereidoswiki.ddns.net/index.php/Fu Fu], [https://anothereidoswiki.ddns.net/index.php/Rai Rai]
| |
| |1/01/2022 - 1/31/2022
| |
| |-
| |
| |[[File:Banner Amberdon.jpg|link=https://anothereidoswiki.ddns.net/index.php/File:Banner%20Amberdon.jpg|300x300px]] | |
| |Release Celebration 1
| |
| |Amberdon
| |
| |[https://anothereidoswiki.ddns.net/index.php/Jalam Jalam], [https://anothereidoswiki.ddns.net/index.php/Yabsakha Yabsakha], [https://anothereidoswiki.ddns.net/index.php/Elaine Elaine], [https://anothereidoswiki.ddns.net/index.php/Seals Seals], [https://anothereidoswiki.ddns.net/index.php/Zacharoff Zacharoff]
| |
| |
| |
| 12/25/2021 - 1/14/2022
| |
| |- | | |- |
| |[[File:Banner Variey.jpg|link=https://anothereidoswiki.ddns.net/index.php/File:Banner%20Variey.jpg|300x300px]] | | |3★ |
| |Release Celebration 2
| | |38% |
| |Pays Blanc
| |
| |[https://anothereidoswiki.ddns.net/index.php/Rook Rook], [https://anothereidoswiki.ddns.net/index.php/Flet Flet], [https://anothereidoswiki.ddns.net/index.php/Amorey Amorey], [https://anothereidoswiki.ddns.net/index.php/Sol Sol], [https://anothereidoswiki.ddns.net/index.php/Billford Billford]
| |
| |12/25/2021 - 1/14/2022
| |
| |} | | |} |
